
 0
0

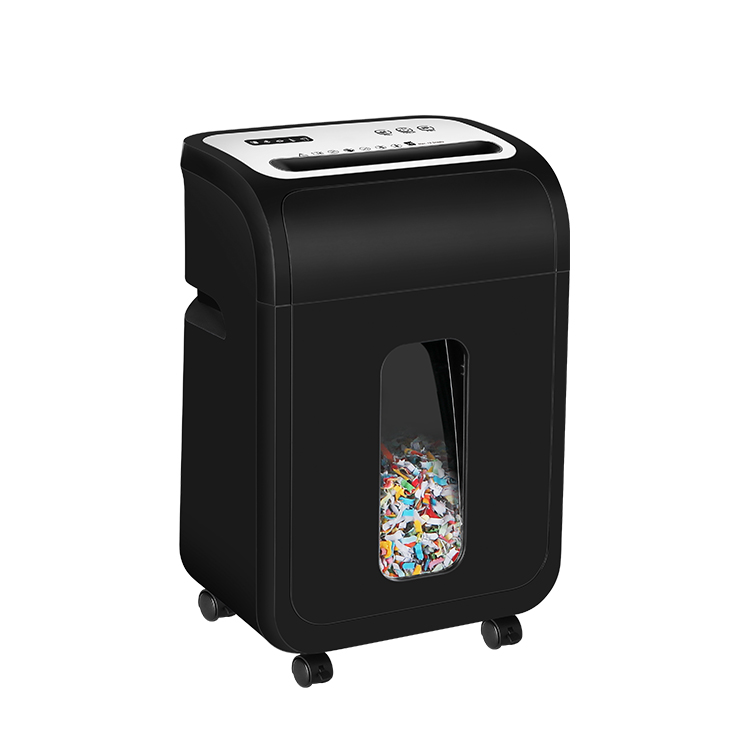
Why Is Your Home Office Shredder Jamming and How Can You Fix It?
A paper jam is the most common frustration for anyone using home office shredders. Whether you are clearing out old tax returns or destroying sensitive client memos, a jammed machine can bring your productivity to a halt. Understanding what makes a shredder jam and how to resolve it safely is key to maintaining your equipment.
Why Do Your Home Office Shredders Constantly Jam?
In the era of remote work and home financial management, Home Office Shredders serve as the final line of defense for personal privacy and data security. However, the most frustrating issue for any user is the dreaded “paper jam.” When the machine emits a piercing hum only to grind to a halt, or when paper becomes hopelessly wedged in the cutters, it does more than just stall your productivity—it can cause permanent damage to the motor.
Before reaching for tools or seeking repair services, we must first become “detectives” to identify the culprit behind the malfunction. Most jams occurring in small office shredders or consumer-grade models have deep-seated physical and operational causes.
1. Overfeeding: The High Cost of Challenging Capacity Limits
This is the most frequent cause of jams in Home Office Shredders. Every shredder is engineered with a specific “Sheet Capacity” at the factory.
Understanding the Physical Constraints of Sheet Counts
If you own a model rated for a “10-sheet” capacity, this means its motor speed, torque, and blade hardness are designed based on standard 80g/m² office paper. When you attempt to force in 12 sheets or more at once, the gap between the blades becomes completely saturated, causing friction to rise exponentially.
The Trap of Paper Thickness and Texture
Many users overlook the “weight” of the paper. For example, a single thick piece of cardstock or a heavy-duty shipping label may have a thickness equivalent to 3–4 sheets of standard copy paper. If you fail to reduce the count based on thickness, the motor will either trigger its overheat protection due to an instantaneous overload or cause the paper to “accordion” at the blades, creating a total deadlock.
2. Mismatched Materials: “Indigestion” for the Cutting Head
Home Office Shredders are not universal pulverizers; their cutting systems are highly precise instruments. Feeding materials that do not meet design specifications is a direct invitation to mechanical failure.
Adhesive Substances: The Invisible Killer
Many users habitually feed paper with glue, double-sided tape, or unpeeled shipping labels into the shredder. These adhesives melt under the heat generated by the high-speed rotation of the blades, forming a resilient “glue film” that coats the cutters. Over time, these sticky residues trap paper dust, eventually clogging the blade gaps entirely and leading to a severe “adhesive jam.”
Challenges from Rigid Materials and Plastics
Beyond paper, common forbidden items include:
- Corrugated Cardboard: Thick layers that exceed the cutting depth of the blades.
- Plastic Bubble Mailers: The high elasticity of plastic causes it to wrap around the drive shaft rather than being sliced.
- Metal Oversizing: While many models support staples, large paper clips or industrial-grade staples can chip the teeth of the blades.
Comparison of Mismatched Materials and Their Impact
To help you visualize the damage caused by various materials, the table below lists common errors and their consequences.
| Material Type | Common Examples | Direct Impact on Shredder | Repair Difficulty |
|---|---|---|---|
| Adhesives | Stickers, Shipping Labels, Tape | Glue melts and binds blades, creating a stubborn residue | Extreme (Requires professional cleaning) |
| Rigid Fibers | Cardboard, Hardcover Book Jackets | Insufficient motor torque causes mid-cycle stalls; damages gears | Medium (Requires manual reverse) |
| Flexible Plastics | Bubble Envelopes, Plastic Wrap, Lamination | Film wraps around the main shaft; causes motor burnout | High (Manual removal is risky) |
| Large Metals | Binder Clips, Heavy Staples, Industrial Pins | Chips or dulls the cutting edges; permanent loss of efficiency | Irreversible (Requires blade replacement) |
3. Fast Feeding: Ignoring the Physical Clearance Cycle
When using Home Office Shredders to tackle a large backlog of documents, many users adopt a “seamless” feeding approach to save time.
The Accumulation Effect of Residue
When the first batch of paper has not fully cleared the cutters to fall into the bin, feeding the second batch causes the load on the cutting head to double instantaneously. Uncut paper fibers interweave with the new incoming paper, creating a “funnel effect” blockage at the exit point.
Sensor Response Latency
Most auto-sensing shredders rely on infrared sensors. Feeding paper too continuously and rapidly can prevent the sensor from recognizing the end of a single cycle. This keeps the motor in a high-power state for too long, which not only invites jams but also significantly shortens the Duty Cycle, causing the machine to enter overheat shutdown frequently.
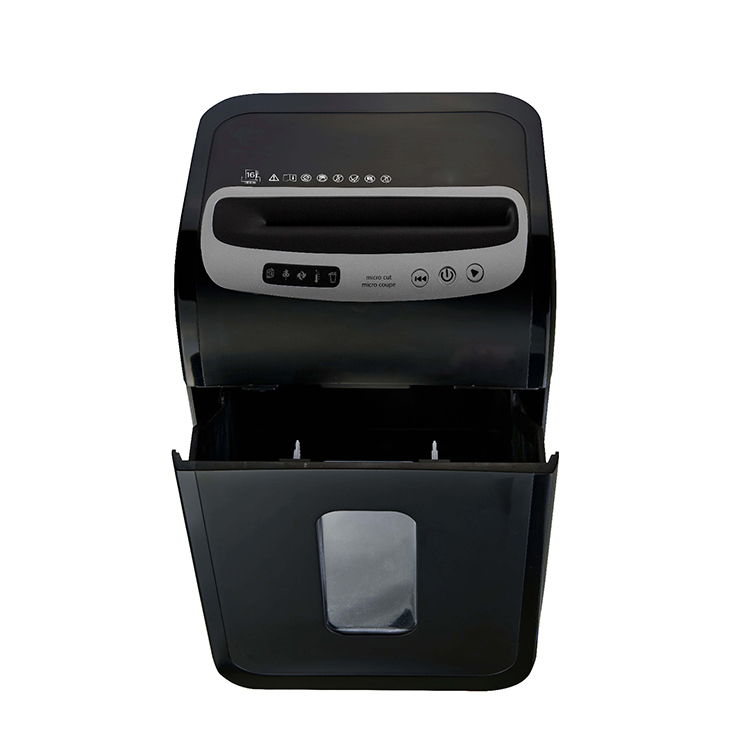
4. Bin Fullness: Triggering the “Bottom-Up” Reverse Jam
This is perhaps the most overlooked, yet easiest to solve, cause of jamming. When the pile of scraps inside the bin exceeds the exit limit, disaster strikes.
The Principle of Reverse Blockage
When the shredded paper inside the bin builds into a “mountain” and touches the bottom of the cutting head, newly cut paper cannot fall through. As the blades rotate, these bottom scraps are “pulled back” into the blade gaps. The pressure generated by this reverse compression is far greater than forward feeding, causing the paper to be extremely compacted inside the blade box into a rock-hard mass.
False Sensor Errors
In some high-end Home Office Shredders, an overfilled bin triggers a safety sensor to lock the machine. If you force the machine to continue shredding when the bin is full, the paper scraps may crush or damage the delicate sensor probes, causing the machine to show a persistent “Full” error even after the bin has been emptied.
Step-by-Step Solutions for Paper Jams in Home Office Shredders
In the process of using Home Office Shredders, paper jams are an almost inevitable challenge. When the motor emits a heavy humming sound or the paper remains motionless in the feed slot, using blind force to pull it out often backfires, potentially causing the expensive internal gears to snap.
Phase 1: Utilizing Machine Power for Self-Clearing
Most modern Home Office Shredders are engineered to anticipate minor jams and are equipped with basic physical remedy functions.
Step 1: Cleverly Using the Reverse Function
Most home shredder control panels feature a “REV” or “Reverse” setting. This is the first line of defense for resolving minor jams in Home Office Shredders.
- Alternating Logic: Do not hold the reverse button for an extended period. The correct approach is to switch to “Reverse (REV)” mode for a few seconds to see if the paper is “spit out.” If the paper retracts slightly but jams again, immediately switch back to “Forward (FWD/Auto)” mode.
- The Physical Wiggle Effect: By toggling repeatedly between forward and reverse, you create a physical “wiggle” force that gradually loosens the paper fibers tightly gripped in the blade gaps. This method is highly effective for jams caused by slightly exceeding the sheet capacity.
Step 2: Thoroughly Clear the Waste Bin
This is an often-overlooked “hidden” cause of failure. Many Micro-cut Shredders are equipped with high safety standards that restrict the machine from further operation when the sensors detect a full bin.
- Bottom-Up Pressure: When shredded scraps pile up like a “mountain” inside the bin and touch the bottom of the cutting head, they act like wedges, jamming backward into the blades. Emptying the bin relieves this reverse pressure.
- Sensor Reset: After emptying and re-installing the bin, the machine’s logic circuits often reset automatically. If the machine resumes operation at this point, it indicates that the previous “jam” was actually a logic lockout triggered by an overfilled bin.
Phase 2: Advanced Manual Intervention and Tool Assistance
If electrical power cannot resolve the issue, we must perform fine-tuned manual processing in a completely de-energized state.
Step 3: Manual Extraction and Debris Removal (Power Off)
When the motor makes an abnormal load sound but the paper remains still, it indicates that the jam has entered a “hard lock” state. At this point, you must unplug the power.
- Prohibit Finger Use: No matter how safe it looks, never stick your fingers into the feed slot.
- Professional Tool Intervention: We recommend using a pair of needle-nose pliers. The long, thin tips of the pliers can reach deep into the blade gaps to firmly grip the exposed edges of the paper.
- Pulling Technique: Use the pliers to pull the paper scraps slowly and steadily upward (or downward from the bottom exit). Be careful not to shake it side-to-side to avoid tearing the paper, which leaves difficult-to-clean fragments deep in the crevices.
Phase 3: Chemical Lubrication and Softening Solutions
When paper creates immense friction due to overheating or adhesive residue, physical pulling may fail. This is when a lubrication strategy is needed.
Step 4: The Professional Shredder Oil Lubrication Method
Home Office Shredders require regular maintenance just like a car engine. If the machine is locked due to dry friction or sticky residue, lubrication oil is the final savior.
- Penetration and Softening: Apply a few drops of specialized Shredder Oil or a Lubricant Sheet precisely onto the contact surface between the paper and the blades.
- The Value of Patience: After lubrication, please let it sit for 15 minutes. This time allows the oil to fully penetrate the tightly compressed paper fibers, making them moist and slippery while dissolving some of the glue from label residues.
- Final Restart: Once the fibers have softened, reconnect the power and attempt to use the reverse mode again to eject the obstruction.
Troubleshooting Methods and Tool Selection Reference Table
To improve repair efficiency, refer to the table below to select the most appropriate treatment.
| Jam Phase | Recommended Tool | Core Objective | Safety Level |
|---|---|---|---|
| Minor Obstruction | Built-in REV Button | Use motor power to reverse out paper | High (No blade contact) |
| Logic Lockout | Trash Bag / Container | Clear reverse pressure from a full bin | Extreme (Standard op) |
| Severe Hard Lock | Needle-nose Pliers / Flashlight | Manually remove blade obstructions | Medium (Must unplug) |
| Adhesive / Dry Friction | Specialized Oil / Lubricant Sheet | Reduce friction and soften paper fibers | High (Supportive op) |
Maintenance Pro-Tips: How to Avoid Jams Entirely
Repairing a jam might take half an hour, but preventing one takes only 10 seconds.
Stick to the “Less is More” Principle
If your Home Office Shredders are rated for a 12-sheet capacity, use an upper limit of 8–10 sheets in practice. Leaving a 20% power buffer effectively prevents motor fatigue and ensures every cut is completed cleanly.
Identify “Contraband”
Envelopes with plastic windows, thermal shipping labels, and packaging bags wrapped in thick tape are the natural enemies of shredders. Spending a few seconds removing these materials before shredding can save a massive amount of cleanup work later.
Develop a Lubrication Habit
Don’t wait until a jam occurs to remember the oil. We recommend running a lubricant sheet every time you empty the bin twice. This not only prevents jams but also reduces operating noise and significantly extends the life of the internal metal blades of your Home Office Shredders.
Technical Selection Guide: In-Depth Analysis of Jam-Proof Technologies for Home Office Shredders
When shopping for Home Office Shredders, most users focus on shredding speed or sheet capacity. However, what truly determines the user experience and equipment lifespan is the integrated “Jam-Proof Technology.” A paper jam is not just an operational nuisance; it is a severe stress test for the motor and transmission gears.
To find the Best Home Office Shredder, we must look beyond basic specs and dive into advanced technologies that eliminate jam risks at the source. These technologies combine physical engineering with electronic sensing to evolve shredding from “brute force cutting” to “intelligent protection.”
1. Auto-Reverse: The Intelligent “First Line of Defense”
Auto-Reverse is a standard feature in high-performance Home Office Shredders. Its core logic is “prevention” rather than just “remedy.”
The Electronic Sensing Logic of Auto-Reverse
This technology works by monitoring changes in the motor’s electrical current. When too much paper or overly tough material is inserted, the resistance increases, causing a spike in current. Once the sensor captures this signal, it instructs the motor to stop and immediately enter reverse mode within milliseconds—before a physical jam occurs.
Protecting the Motor and Transmission System
Without Auto-Reverse, a motor would continue outputting torque in an attempt to force its way through the obstruction. This “brute force” approach often leads to motor burnout or stripped plastic gears. Auto-Reverse spits the paper back out, prompting the user to reduce the sheet count and significantly extending the machine’s life.
2. Jam-Proof System: Real-Time Thickness Measurement
If Auto-Reverse is “mid-cycle correction,” then the Jam-Proof System is true “pre-emptive prevention.” This is a major benchmark for the Best Home Office Shredder.
Real-Time Paper Thickness Sensors
Sophisticated shredders feature precision photoelectric or pressure sensors at the feed entry. These sensors measure the total thickness of the paper stack in real-time. If the system calculates that the stack exceeds the physical limits of the blades, an indicator light turns red, and the machine will refuse to start.
Eliminating Human Error
Users often subconsciously overfeed or include thick envelopes in a stack. The Jam-Proof System eliminates this margin of error. It ensures every cut remains within the machine’s safe load range, completely eradicating jams caused by overfeeding.
Core Jam-Proof Technology Comparison Table
To assist in your decision-making for Home Office Shredders, the following table compares mainstream technologies and their benefits.
| Technology | Working Principle | Core Benefit | Security Level |
|---|---|---|---|
| Auto-Reverse | Monitors current; auto-backs out on resistance | Prevents overheating; reduces maintenance | High (Active Protection) |
| Jam-Proof System | Measures thickness; stops before starting | 100% eliminates jams from overfeeding | Extreme (Pre-emptive) |
| High Torque Motor | Increased cutting force via gear ratio | Crushes staples and credit cards easily | Medium (Physical Strength) |
| Energy Savings | Auto-power off or sleep mode when idle | Eco-friendly; reduces component aging | Standard (Life Extension) |
3. High Torque Motors: Hardcore Physical Performance
When dealing with complex materials, sensing isn’t enough; you need raw physical driving force. High Torque Motors are the power source that allows Home Office Shredders to handle “non-paper” obstacles.
The Balance of Torque and Speed
Torque represents rotational force. High-performance shredders optimize electromagnetic design or add precision reduction gear sets to translate high-speed rotation into massive cutting power. This means when the blades hit staples, paper clips, or hard credit cards, they won’t slow down or stall.
Challenging Stubborn Materials
For a basic home shredder, a forgotten staple can trigger a jam. However, models with High Torque Motors chew through these metals as easily as plain paper. This physical redundancy makes the machine more resilient under high loads, ensuring it doesn’t quit when the going gets tough.
Prevention is Better Than Cure: Three Golden Rules for Maintaining Home Office Shredders
In the fast-paced modern work environment, Home Office Shredders are often treated as “plug-and-play” tools. However, a shredder is essentially a complex machine consisting of precision metal blades, high-speed motors, and transmission gears. Without proper maintenance, even high-performance models will suffer from declining performance, increased noise, and frequent jamming.
To extend the life of your office equipment and ensure a smooth shredding experience, follow these three golden rules of maintenance. This not only protects your investment but also prevents data processing interruptions at critical moments.
1. Respect the Sheet Limit: Follow the “80% Capacity” Rule
Every manual for Home Office Shredders specifies a “Maximum Sheet Capacity.” This is not just a performance metric; it is a “safety redline” for the machine.
Avoiding Motor Fatigue
If your manual states a limit of 8 sheets, the best practice is to stick to around 6 sheets. Why leave this gap? Operating at full capacity generates higher heat and accelerates the wear of internal parts. Leaving a 20% buffer significantly reduces motor fatigue, ensuring a crisp and clean cutting process.
Consider Actual Paper Thickness
Standard sheet capacities are usually based on 70g/m² or 80g/m² copy paper. If you are shredding thick envelopes or heavy mailers, their physical thickness far exceeds standard paper. In these cases, you may need to reduce the load to 50% of the rated capacity to prevent the blade gaps from being instantly overwhelmed.
2. Regular Oiling: Care for Blades Like a Car Engine
This is the most overlooked yet vital part of maintaining Home Office Shredders. Shredder blades generate massive friction during high-speed rotation.
The Core Function of Lubrication
Just as a car engine needs oil, shredder blades require specialized Shredder Oil. Lubrication serves several key purposes:
- Reducing Heat: Prevents blades from deforming due to overheating during long sessions.
- Clearing Dust: Oil helps carry away tiny paper fibers, preventing them from solidifying into blocks.
- Reducing Noise: A well-lubricated machine runs with a deeper, steadier sound, eliminating metallic squeals.
Recommended Frequency
A scientific maintenance habit is: Oil your shredder every time you empty the waste bin twice, or at least twice a month.
How to Oil Correctly?
Apply the oil in a “Z” pattern onto a piece of paper, then feed that paper through the shredder. Afterward, run the machine in reverse (REV) for a few seconds to ensure the oil evenly coats every tooth of the blades.
3. Respect the Duty Cycle: Scientific Cooling Management
All Home Office Shredders have physical limits, particularly their thermal balance capabilities. This is known as the “Duty Cycle.”
Understanding the Work-to-Rest Ratio
Entry-level small shredders are typically designed for 5–10 minutes of continuous work, followed by a 15–30 minute cool-down. Forcing a “marathon” shredding session causes heat to build up rapidly, eventually triggering the automatic thermal cutout.
Preventing Thermal Degradation
Even if the machine doesn’t shut down, high temperatures can soften internal plastic gears, making them more prone to stripping or breaking when handling tough materials. The professional approach is to break large shredding tasks into smaller segments. Use the cooling periods to handle other office tasks.
Frequently Asked Questions (FAQ)
Q1: Can I use regular cooking oil or sewing machine oil instead of specialized shredder oil?
A1: Absolutely not. Cooking oil will turn rancid and sticky over time, emitting odors and eventually seizing the cutting head completely. Mineral oils like sewing machine oil have a lower flash point, posing a fire hazard under the high temperatures generated by high-speed shredding. Always use specialized Shredder Oil (usually a low-volatility vegetable-based formula) to ensure safety and performance.
Q2: Why does my shredder show a “Jam” light even when no paper is inserted?
A2: This is usually caused by dust obstructing the sensors. Feed slots on shredders typically feature infrared sensors; if left uncleaned, accumulated paper dust can trick the system into thinking paper is present. Unplug the unit and use a can of compressed air or a dry cotton swab to gently clean the sensor points located in the center of the feed slot.
Q3: Can shredders handle paper clips and staples?
A3: This depends on your specific model. Most mid-to-high-end Home Office Shredders can easily process standard staples, but large paper clips or industrial staples may chip the cutting teeth. We recommend developing a habit of removing large metal attachments before shredding to maintain long-term blade sharpness.
Q4: What is the difference between “Micro-cut” and “Cross-cut,” and which is less prone to jamming?
A4: Cross-cut shreds paper into small strips, while Micro-cut turns paper into much smaller particles (offering higher security). Because Micro-cut debris takes up less volume, it is less likely to cause a “bottom-up” jam in the bin. However, it requires higher motor torque. For machines with identical specs, a Cross-cut model can typically handle more sheets per pass.
Q5: What should I do if my shredder stops due to overheating?
A5: Immediately turn off the switch and unplug the power. Let it sit for 20–30 minutes. This is the machine’s “Thermal Protection” mechanism at work. Avoid trying to force-cool the motor with cold air; letting it dissipate heat naturally is the best way to protect the internal circuit boards.
Related References
Citing these authoritative standards on your corporate website significantly boosts the E-E-A-T (Experience, Expertise, Authoritativeness, and Trustworthiness) of your content:
- DIN 66399 Standard:
- Information Technology — Office Machines — Destruction of Data Carriers: This is the globally recognized standard for data destruction security, defining the security levels from P-1 to P-7, which form the technical foundation for Home Office Shredders.
- ASTM F1487-21:
- Standard Performance Requirements for Office Shredders: A standard from the American Society for Testing and Materials covering performance testing, safety evaluations, and durability metrics for shredders.
- NFPA 70 (National Electrical Code):
- Safety Standards for Office Appliances: Electrical safety and fire prevention codes for operating office appliances (including shredders) in a home environment.
- Health and Safety Executive (HSE) Guidance:
- Using Office Equipment Safely: Official safety operational guidelines for preventing mechanical injuries (such as preventing finger entanglement) from office equipment.
- International Journal of Occupational Safety and Ergonomics (JOSE):
- Research on Noise Pollution and Maintenance of Small Office Appliances: Academic research exploring the impact of regular lubrication on reducing noise and improving mechanical efficiency in office appliances.


-
 Gruppo Kaifat, No.599, Qiming Road, Yinzhou Incubation, Ningbo, Cina
-
 +86-574-55665196
-
 [email protected]
Diritto d'autore© Ningbo Ofitech Business Machines Co., Ltd. Tutti i diritti riservati.
